On this page
Beating Sálmar, the Cursed Moonwane comes down to three things: it is a two-phase fight, it only spawns through the Soul Experiment questline in Hallowgrove’s Chaos mode, and the single biggest mistake newer hunters make is walking into the Chaos-only fight without first learning Hallowgrove’s routes, extraction points, and regular enemies on Normal. This guide covers what the fight requires, how to gear for it without overspending, why a trio beats a solo pull on your first kill, and whether the reward is worth chasing if you don’t need the weapon.
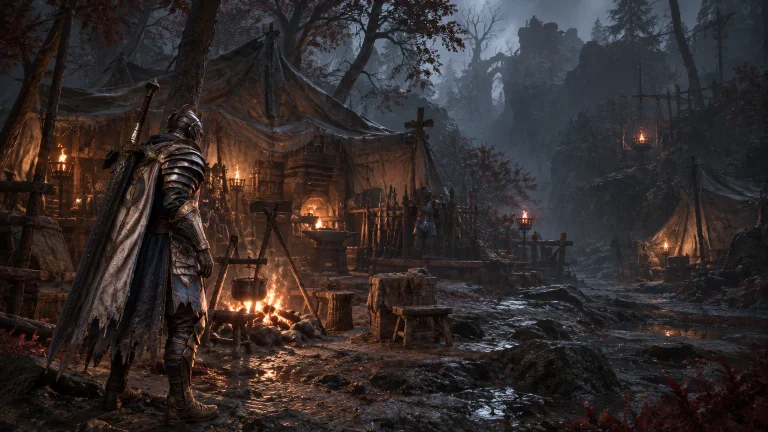
Sálmar, the Cursed Moonwane is a two-phase boss in Hallowgrove’s Divine Anchor, the “False God” born from the failed god-making experiments of the Prayer of the Moon in the Soul Experiment questline. The Prayer of the Moon and the Archwizard bound themselves to the Divine Anchor, using souls and flesh to sustain the experiment, nurturing a creation that should never have existed: a False God. That lore matters mechanically because it’s the reason the fight is tied to a specific quest chain rather than sitting on the open map as a random spawn.
Sálmar herself is tied to the Chaos-only Soul Experiment encounter. Use Normal Hallowgrove to learn the map, regular enemy pressure, and extraction routes—not to rehearse this boss. The tougher Einherjar variant is reached from a Chaos match with a Dried Flower Knot. If you’re still deciding which class to bring, the best starting class breakdown is worth reading before you commit a build.
TL;DR
- Sálmar is fought in Hallowgrove Chaos through the Soul Experiment quest, and the encounter is confirmed as two phases.
- Chaos mode entry needs a gear value floor with a quality ceiling — go in under-geared or over-geared for the wrong reason and you’re wasting a run.
- Learn Hallowgrove’s routes and regular enemies on Normal first; Sálmar herself must be learned in the Chaos-only encounter.
- Take two other hunters for your first kill — Sálmar hits hard enough that solo mistakes are often lethal, while a trio spreads the pressure.
- The reward is a Holy weapon unique to this boss, but the drop is not confirmed to be guaranteed on every clear.
| Difficulty Tier | What It Is | Squad Size |
|---|---|---|
| Normal | Learning mode — lower stakes, used to read the moveset before risking gear | Solo or Trio |
| Chaos | Where Sálmar actually drops loot; gated behind an equipment value floor | Solo or Trio |
| Einherjar | A harder variant reachable inside a Chaos match, switched on with a specific key item | Trio (Chaos match required) |
Preparing for Hallowgrove Chaos: Gear Requirements and Why Normal Comes First
Hallowgrove Chaos asks for 1,000+ equipment value and Legendary-or-lower quality, so it is the first Chaos map most hunters gear toward. That ceiling matters as much as the floor — going in with anything above Legendary quality doesn’t help and can flag you outside the mode’s intended bracket, so don’t burn a Holy weapon or a rare drop chasing overkill stats for this specific run.
The safer preparation step is learning Hallowgrove itself on Normal. Use those runs to memorize landmarks, regular enemies, resources, and extraction routes. Sálmar does not appear there, so her two-phase moveset still has to be learned in Chaos. If you haven’t touched Chaos mode yet, the Chaos Mode gear requirements guide covers the broader entry rules.
Warning
You cannot practice Sálmar on Normal. For the first Chaos attempt, bring replaceable gear, learn the map beforehand, and treat the boss pull as a learning run rather than risking your most expensive loadout.
| Prep Step | Normal Mode | Chaos Mode |
|---|---|---|
| Gear risk on death | Low — built for learning | Higher — this is the loot-relevant tier |
| Equipment value needed | None specific | 1,000+ equipment value |
| Quality ceiling | None specific | Legendary or lower |
| Purpose | Learn phase transitions and movement patterns | Actual kill attempt for the Holy weapon drop |
Where the grind outlasts the interest, Mistfall Hunter boosting picks it up from wherever the account already stands.
Why You Should Take a Trio Into Your First Sálmar Kill
Both Normal and Chaos reportedly support Solo or Trio, but a squad covers weaknesses a solo player cannot. For a first kill specifically, that’s not just a nice-to-have. A boss with confirmed phase transitions punishes a single misplay hard enough that a solo attempt can end the run outright, while a trio spreads that pressure across three health pools and three sets of cooldowns. If your camp economy isn’t set up to absorb a bad run yet, the camp upgrades priority guide is worth checking before you fund a Chaos-tier loadout for three people.
Trio players can spec into peel or buff capabilities on support-leaning builds knowing allies cover burst. That’s the practical case for three over one: it’s not that solo is impossible, it’s that a solo mistake against a boss this new has no safety net yet.
| What to Bring | Why | What to Swap It For |
|---|---|---|
| A dedicated tank or block-focused build | Something has to eat hits while the other two work through phase mechanics | A high-mobility class if your trio prefers kiting over blocking |
| Ranged or spell damage class | Keeps pressure on Sálmar during moments where melee has to reposition | A second melee if your group is confident in positioning |
| Sustain or peel support | Trio comps can spec into peel knowing allies cover burst, which is exactly the safety net a first kill needs | A third damage class if you're overgeared for the fight already |
| Extraction-ready loadout under the 1,000 value floor | You want to clear the Legendary quality ceiling without overshooting it | Nothing — this one isn't optional for Chaos entry |

How the Sálmar Fight Actually Plays Out
Here’s the honest state of things: a fully mapped, phase-by-phase attack breakdown for Sálmar isn’t settled yet. The boss is still recent, and detailed movesets, attack names, and timing windows haven’t stabilized across community sources the way they have for older bosses. What is confirmed is the shape of the encounter, not the exact script.
Sálmar is a two-phase boss in Hallowgrove’s Divine Anchor, and the encounter is built around a “concealment leading to breaking free” visual theme, with phase one centered on concealment using veils and tattered clothing. Treat that as a design principle rather than a full script: expect the opening phase to obscure or disguise the boss’s true attack tells, and expect the fight to open up — literally and mechanically — once that first phase breaks. Beyond that, don’t trust any source claiming a precise health-percentage phase trigger or a named attack list yet; if you see one, it’s guesswork dressed up as a guide.
Tip
Since the moveset isn’t fully mapped, treat your Normal-mode run as scouting, not a formality. Watch for the moment concealment mechanics drop away — that transition is your cue that phase two has different rules than phase one.
Step-by-Step: First Sálmar Attempt Walkthrough
Follow this sequence to get it done fast.
-
1
Clear the Soul Experiment questline up to the Divine Anchor
you cannot queue into the Sálmar encounter without progressing this quest chain first.
-
2
Run the fight once on Hallowgrove Normal
treat this as a scouting pass to read the concealment phase before any gear is on the line.
-
3
Gear your trio to the Chaos floor
hit the 1,000+ equipment value requirement while staying at Legendary quality or below.
-
4
Assign roles before you queue
decide who tanks, who peels, and who carries sustained damage so nobody improvises mid-fight.
-
5
Queue Hallowgrove Chaos and commit to the plan
play the opening phase conservatively until you've confirmed how your specific squad reads the concealment mechanics.
-
6
Extract immediately after the kill
don't linger for a second look at loot in a mode that still carries PvP and Corroded risk.
Sálmar's Holy Weapon Reward: Is It Worth the Trip?
Each Boss Drops Its Own Holy Weapon
Launch-content Holy weapons are confirmed to drop exclusively from map bosses, each boss carrying its own unique weapon and gameplay affixes. There is no shared loot pool here — Sálmar’s Holy weapon is not something Otto the Flesheater or General Harald can also drop, and vice versa. If a specific boss’s weapon doesn’t fit your class, killing that boss repeatedly won’t fix that.
Holy Weapons Change How Skills Work, Not Just Their Numbers
Holy weapons carry exclusive gameplay affixes that reshape how skills behave rather than simply raising numbers, giving every skill a base version, a talent-modified version, and a Holy version. That’s the actual pitch for grinding this fight: it’s not a bigger damage number, it’s a different way your kit functions. If your class’s Sálmar drop doesn’t touch a skill you actually use, the upgrade is smaller than the rarity suggests.
| Reward | How You Get It | Why It Matters |
|---|---|---|
| Boss-unique Holy weapon | Drops from defeating Sálmar in Hallowgrove Chaos | Carries exclusive affixes found on no other weapon in the game |
| General crafting/loot materials | Standard Chaos-tier clear rewards | Useful even on a run where the Holy weapon doesn't drop |
| Auction House value | Holy weapons can be sold if you land a duplicate or an off-class roll | Turns a "wrong class" drop into currency instead of dead weight |
Common Misconceptions About Beating the Mist Lord in Mistfall Hunter
Myth: You Have to Fight Sálmar Solo to “Prove” Anything
There’s no mechanical reward for soloing this fight over trioing it. A squad covers weaknesses a solo player cannot, and for a first kill on an encounter with an unsettled moveset, that safety margin is worth more than the bragging rights.
Myth: Chaos Gear Requirements Are Just a Suggestion
The 1,000+ equipment value and Legendary-quality ceiling aren’t loose guidelines — they’re the actual entry gate for Hallowgrove Chaos. Showing up under the floor gets you stonewalled at queue; showing up over the ceiling doesn’t help you and may not even be intended for this bracket.
Myth: Normal Mode Lets You Practice Sálmar
Normal Hallowgrove is useful for learning the map and extraction route, but it does not reproduce the Chaos-only Sálmar encounter. Her boss mechanics must be learned in Chaos, ideally with a trio and a replaceable first-attempt loadout.
Our Take: Is Farming Sálmar Worth It?
Our Take
Worth doing once for the experience regardless; worth repeating only if your class actually wants what Sálmar drops.
The fight itself is a reasonable difficulty check before harder Mist Lords — it teaches Chaos-mode stakes without the full weight of Brandrgarde’s Cataclysm content. But skill, positioning, and class knowledge still decide fights, and you don’t need a Holy weapon to compete. If Sálmar’s specific weapon doesn’t fit your build, farming repeat kills for a drop you’ll just list on the Auction House is a worse use of time than gearing toward a boss whose reward you’d actually equip.
Was this guide useful?
Mistfall Hunter services
Leveling
Character Boost 1-8
Character taken from level 1 to 8, any class · Covers the flattest stretch of the early game
Leveling
Character Boost 1-12
Character taken from level 1 to 12, the cap · Any class, chosen at checkout
Camp & Bundles
Camp Improvements
Camp upgrades worked through on your account · Permanent progress: it survives a bad run