On this page
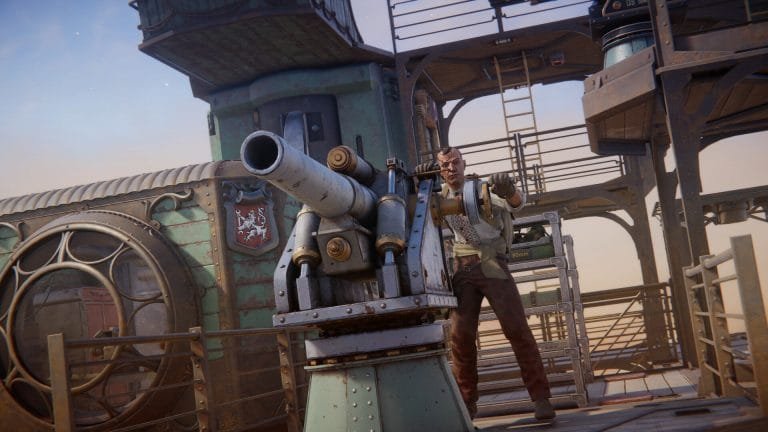
Most Early Access extraction shooters hand you a gun and a prayer. SAND: Raiders of Sophie hands you a walking dieselpunk fortress called a Trampler, drops you into an alternate-1910 desert, and waits for you to figure out why your reactor just exploded. The Steam reviews sit at Mixed with 60% positive, and the biggest complaint is not the concept — it is that the game never explains which mistakes cost you everything.
The Short Answer
The deaths that matter in SAND fall into three categories: Upior ambushes you did not see coming, Trampler system failures you did not repair in time, and PvP scenarios where another crew heard your weapons or saw your engine smoke. Sand Wraiths are the only S-Tier Upior threat — they actively hunt isolated players, deal fatal damage in two hits, and require coordinated heavy-weapon focus-fire to drop. Most early wipes come from players looting on foot without scanning for threats first.
Trampler combat has a kill order: legs first to cripple mobility, cannons second to eliminate return fire, then reactor to finish the ship — but the captain survives and can steal your Trampler if you do not hunt them down. The crew that understands target priority wins. The crew that just shoots the hull loses their ship and everything in it.
If you are dying more than you are extracting, one of these seven patterns is the reason.
The same route is available as SAND: Raiders of Sophie boosting for anyone who would rather not sit the grind out twice.
Sand Wraith Encounters Without Heavy Weapons
The Sand Wraith dominates as the only S-Tier PvE threat — it actively hunts isolated players, moves with terrifying speed, and deals enough damage to kill an armored crew member in two hits. This is not a standard mob you can chip down with small arms. The Sand Wraith Power Core is exposed during its charge attack animation for a 3-second window — the core is on its back, requiring flanking or coordinated distraction.
The failure pattern here is simple: solo players who stumble into Sand Wraith territory without a Railgun die before they understand what hit them. Never engage a Sand Wraith head-on — assign one crew member as bait to trigger the charge while the rest flank to attack the Power Core, bring Railguns for maximum damage during the vulnerability window, and if you lack heavy weapons retreat immediately.
Why Players Keep Dying to Sand Wraiths
The tells exist but new players do not know to look for them. Sand disturbance patterns appear on the ground 3 to 5 seconds before the Wraith emerges — ripple-like movement in the sand surface that moves toward your position, subtle in Phase 1 and easy to miss without a dedicated Spotter. If you see ripples moving toward you, stop looting and get back to your Trampler.
The Correct Counter
Crew size matters more here than anywhere else. Solo Sand Wraith kills are possible but require perfect execution and a Railgun. The most dangerous scenario is fighting a Sand Wraith or Dune Stalker pack when a rival crew flanks you mid-engagement — always scan for other crews before committing to a major Upior fight. Two-player minimum, heavy weapon mandatory, bait-and-flank tactics required. Anything less and you are gambling.

Running Your Engine While Looting
This one catches everyone exactly once. A running engine kicks out a thick column of black smoke that other players can spot from miles away and burns fuel even when parked — switch the engine off whenever you stop to loot a wreck to hide your position and save fuel, and use binoculars to scan the horizon for smoke before trouble reaches you.
The math is brutal: your engine smoke is visible long before you see the crew that is about to ambush you. Standing at a crashed ship with your engine running is functionally the same as firing a flare and yelling your coordinates into proximity chat. Standing still at a crashed ship is how you become someone else’s loot pile.
Turn the engine off. Loot fast. Turn it back on when you move. The 5 seconds it takes to toggle the engine saves the entire run.
| Scenario | Engine Status | Outcome |
|---|---|---|
| Looting wreck, engine on | Smoke visible 800+ meters | PvP ambush within 90 seconds |
| Looting wreck, engine off | No smoke signature | Clean loot, safe extraction |
| Moving between sites | Engine required | Accept the visibility risk |
Ignoring Trampler Reactor Damage
To finish a Trampler you destroy its reactor — that wrecks the ship and stops the enemy respawning, but the captain is still alive and can run for extraction or steal your ship. The same mechanic applies to your Trampler. The second your Trampler takes damage get on the multi-tool and patch it up — the pipes, plates and circuit boxes dotted around the captain’s quarters, crew rooms and the reactor itself.
Players consistently report the same failure: they focus on returning fire during a Trampler fight and ignore the sparking reactor warning until it is too late. A destroyed reactor is instant mission failure. You lose the ship, the loot, and the extraction window.
Repair Priority During Combat
- Reactor damage: drop everything and repair immediately
- Leg damage: second priority — mobility loss makes you a stationary target
- Hull breaches: repair between volleys when safe
Assign one crew member to repairs during PvP. The player on the multi-tool is worth more than a second cannon. Lose the reactor and the fight ends.
Looting Too Long at High-Value Wrecks
Speed matters more than thoroughness — a complete loot run that ends in a PvP wipe is worse than a fast partial run that extracts cleanly. The common failure here is greed. Players find a military wreck with locked boxes and high-tier crates, and they try to grab everything. Staying too long at a wreck invites PvP pressure.
The window is roughly 60 to 90 seconds from the moment you arrive. After that the odds of another crew showing up spike hard. Do not sort loot while standing on the wreck — move away from the ship first then organize. Inventory management at the loot site is how you hand another crew a free kill.
Scout the wreck before approaching. Look for other Tramplers, check for engine smoke on the horizon, listen for gunfire. If another crew is already there, let them have it and move to the next site. A contested wreck is a coin-flip you do not need to take.
Fighting Dune Stalker Packs Without Crew Coordination
Dune Stalkers operate in packs of 3-5 and use flanking tactics — one Stalker engages from the front while others circle to attack from the sides and rear, designed to pull your attention in multiple directions. Solo players and uncoordinated crews get shredded because they tunnel-vision on the Stalker in front of them while two more close from behind.
Position your crew in a ring facing outward with mounted weapons covering the approach vectors — the area-denial weapon excels here because its sustained fire covers a wide arc hitting multiple Stalkers as they attempt their flanking maneuver. The Stalkers are not individually dangerous. The pack behavior is what kills you.
The Break Point
Dune Stalker exposed joints are the primary vulnerability — precision shots to the joints deal increased damage and can temporarily cripple movement. Focus one Stalker at a time, cripple it, then rotate to the next threat. Spreading damage across the pack lets all of them stay mobile and maintain the flank.
Two-player crews should back-to-back at the Trampler. Three-plus can form a proper perimeter. Solo players should not fight Stalker packs on foot — mount the Trampler cannon and use the height advantage.
Approaching Extraction Without Scouting
Upior spawns intensify as the storm closes in during Storm Dive — the final 3 minutes before extraction typically see a 40-60% increase in Upior activity with higher-tier spawns replacing lower-tier ones, designed to pressure crews during the most vulnerable phase. Add rival crews who know exactly where you are heading and extraction becomes the highest-risk moment of any run.
The mistake is rushing. You have loot, the extraction timer is ticking, and you drive straight into the zone without checking what is already there. Extraction zones are PvP magnets. Every crew on the map is converging on the same small area, and whoever gets there first has the defensive advantage.
Extraction Approach Checklist
- Stop 200 meters out and scan with binoculars
- Listen for Trampler cannons and Upior combat audio
- Check for engine smoke near the extraction point
- If contested, wait for the fight to finish then third-party the winner
Crews that burn through Heavy Cannon ammunition clearing low-threat Upiors early often find themselves without area-damage options when Dust Crawler swarms or Dune Stalker packs appear during the final push — budget ammunition based on expected threat levels and always reserve at least 30% of mounted weapon ammo for extraction defense. Running dry at extraction is a death sentence.
Exposed Reactor Positioning During Trampler PvP
Protect your own reactor by steering it away from the enemy’s guns — defense wins these brawls as much as offense. New players fixate on landing shots and forget that Trampler combat is positional. The reactor sits in a specific location on your chassis. If that side faces the enemy cannons, you lose.
The correct play is angle your Trampler to keep the reactor-side away from the enemy firing arc while your gunner focuses the kill order: legs, cannons, reactor. Most new players get target priority wrong by blasting away at the whole ship — go for the legs first to cripple mobility so they cannot flank or escape, next take out their cannons so they cannot punish you back.
Crews that nail the positioning and target priority win fights against better-equipped opponents. Crews that ignore either mechanic lose ships they should have kept.
The Bottom Line
Depends on whether you are learning the game or already know the basics. If you are new and dying constantly, the issue is probably engine discipline and Sand Wraith encounters — turn the engine off when looting, do not engage S-Tier Upiors solo, and treat extraction zones like contested PvP arenas because they are. For crews past the early fumbling stage, the deaths that matter are positional: reactor exposure during Trampler fights, staying too long at high-value wrecks, and burning through ammunition before the final push.
SAND rewards methodical play and punishes greed. The difference between a successful run and a wipe is usually one decision: scouting before approaching, repairing the reactor during combat, or leaving loot on the table to extract safely. Get that part right and the rest follows.
Was this guide useful?
SAND: Raiders of Sophie services
Weapons & Kits
Experimental 80mm Railgun Kit
Experimental 80mm Railgun Kit — the top tier of the line · Fitted to your loadout, EU server only
Misc & Currency
Crate of 1889 Chardonnay
Collectible Crate of 1889 Chardonnay · EU server only
Misc & Currency
Crown Coins (x1000)
1,000 Crown Coins delivered to your account · EU server only